Monday, September 14, 2020

The "Personal Challenge" Continues

If you've been reading this blog recently, you know that during the month of August, several members of the Southern Connecticut Polymer Clay Guild (SCPCG) participated in a weekly challenge called the 820 Challenge.  Each person picked a personal goal, interest or challenge, and would share progress weekly with the whole group.  It was a great learning experience - and fun to see and share with others. So, we decided to continue the concept of a personal challenge.  This time, we're meeting on zoom every other week rather than weekly.  It gives us all a bit more time to experiment.
I plan to use this challenge to try some tutorials I've never done, as well as experiment with different materials or tools, and try out some ideas of my own.  Should be interesting - and fun!
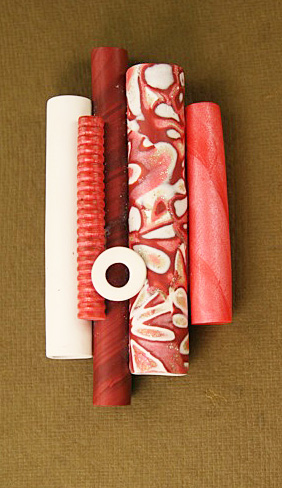
For this first session, I decided to try a tutorial that uses dish detergent to create surface bubbles for decoration and texture on polymer clay.  The tutorial comes from Thinking Outside the Box and is titled "New Polymer Clay Surface Technique."    It's a fun technique, and I enjoyed giving it a try. Since this was an experiment, I didn't spend a lot of time finishing the edges.  I liked this enough to plan on doing it again, and will pre-plan edging and finishing work.  I used Magic Gloss for the resin top, while the tutorial suggests using another product.

In these two samples, you can see how the soap bubbles create a fun background look and texture.  The Lumiere halo paints also reacted differently, and the lighter color showed the bubble texture off best.  I don't know if mica powders would work well, and may just have to experiment some more. :)

Sunday, September 13, 2020

Making A "Bubble" Cane

Hello! In addition to the bi-monthly challenge group, the group that made the polymer cane has decided to keep picking a cane to make, and then sharing their results.  So for September, they chose a pattern called a "Bubble Cane" and I decided to give it a try. The "bubbles" are the little bullseye canes along the side of what tends to look like a leaf.  Everyone had chosen different colors, and the results were fun to see. Above, I've posted a slice from my cane, and a couple of little flower pieces I made from the cane reduced smaller.


I also made a pod bead from multiple layers of the cane, complete with a small piece of twisting vine.  This was really a rather simple cane to put together, and many of us who made it felt the middle section needed something more.  What do you think?

Monday, August 31, 2020

IMPORTANT NOTICE: It Looks Like Changes Are Coming!!!

Hello!

We're looking at changes everywhere these days, and it appears that I'm going to be facing a major change with my blog.  Blogger, the company that provides this online avenue for individuals to create their own blogs, has decided to update their software.  The change is designed to make the blogs developed with Blogger to be easier to view on cell phones and tablets.  They are also adding a few new bells and whistles, and have given everyone using Blogger a chance to try out the new format to see how it works.

Sadly, I have been unable to use the new platform.  My trusty - still working just fine, thank you - desktop computer is too old to adapt to the new software.  I've known something like this was bound to happen sometime.  I haven't been able to upgrade any of the search engines I use, and there are new programs I can't run on this machine.  It's obviously time to get a new computer.  Sigh. I always find the process of transferring important files takes time, and learning a new operating system and software can be frustrating.  I'll manage, but it will take a bit of time.

The reason I'm telling you all this "tale of woe" is that it may turn out I have to create a completely new blog - new template, new look, new name, new URL address.  I will keep my name in the title of the Blog, and am currently leaning toward "Creations by Kristie Foss."  Blogger said in August that they would be switching everyone over to the new format in September. So, it is possible I will still be able to use this old format for a while.  However, I have a feeling they will stop supporting the old program at some point - probably sooner rather than later.

So, this is a "heads up."  If you visit this blog and notice that nothing is happening for a month or more, then you can assume I am in the process of getting a new computer, learning new operating systems and new software, and making a new blog.  Please be patient and continue to do a Google search for Kristie Foss or Creations by Kristie Foss and see what comes up.  I enjoy sharing what I'm doing, so I will continue to have a blog.  It just may have a new name.

Thank you all for your comments and your viewings over the years. It's hard to believe I've been blogging for over 10 years!  See you online - either here, or in a slightly newer "blog home."

~Kristie

820 Polymer Challenge Week #4

It's the end of August, and we just held our last session of the 820 Polymer Challenge.  It was simply fascinating to see what people had developed.  The ideas, techniques, and concepts were as numerous and diverse as the individuals in the group.  We really had a good time.  It was an excellent incentive to think, dream, create - and share!  As a matter of fact, we enjoyed it so much that the group has decided to continue on, sharing whatever is our current exploration, and meeting in the Zoom room twice a month.  I'm looking forward to continuing our times together.  I know I'll continue to learn from others, and I like the push to stretch myself, too.

Even though we're continuing, it won't be the 820 (August, 2020) challenge anymore. We'll have a new name. :)

Here is the final piece I made for the 820 challenge. It is a pendant composed primarily of tubes.  The patterned tube is made from a mokume gane sheet. The thinnest tube is ridged. I envision attaching a chain to the two outside tubes to make a necklace.  Another option, suggested by one of the 820 participants, was that I could make it into a lariat with a ribbon or chain or rubber tubing extending all the way through the 2 end tubes. I think a hand-died silk ribbon would be especially perfect! :)


Sunday, August 30, 2020

820 Polymer Challenge Week #3

This weekend marked the 3rd week in our August, 2020 challenge.  Once again, I tried out ideas I've not done before.  The first piece has several open circles in complimentary colors floating atop curved lines.  When I was finished, it made me think of a bird in flight. I moved the piece around until I found a position I liked.  When you look at the photo, I hope you can envision a chain or other hanging material coming from the tips of the top white underlying strip.  I think it really would look like something flying when worn as a pendant.


The other piece is three different shapes held together by harmonious colors and two thin, parallel extruded strips.  I tried different angles with this piece, also, but it only seemed to want to be long and tall.  This could work as a pendant or a pin.  As I planned, each piece has at least 2 colors, 2 textures, and 2 different shapes.


Friday, August 21, 2020

Multi-Medium Necklace

Tube beads are fun to make. These tubes were made from a mokume gane and gold-leaf sheet. Of course, once you have the beads baked, you need a way to string them together. This opens all sorts of possibilities for using items from other mediums besides polymer. The various items included in the cording area here include: two different purple shades of silk ribbon,  lavendar yarn, multi-colored nobby yarn, and thin white string with clear crystal bicones.  The tube beads may be moved along the ribbon so the look is changeable.

Tuesday, August 18, 2020

820 Polymer Challenge: Week #2

Welcome to week 2 of the August, 2020 Polymer Challenge. I have 2 new pieces for you, both in the same color-way: white and fuschia. The longer piece is definitely a pendant, and a bail could be hung on the curved half-ring at the top. The pieces down the center are a new shape I made up from a chevron shape. Embellishments include gold-filled wires with small balls on the ends and Swarovski glass pearls.

 I particularly enjoy the roundish piece - it's fun! I cut a partial "splash" shape and made swirl shapes inside the white edging to sort of imitate the splash. This piece has a lot of open space, so whatever is being worn will show through. I think it would work well as a pendant or a pin.

Sunday, August 16, 2020

820 Polymer Challenge: Week #1

As I mentioned in the previous posting, one of the off-shoots from the virtual Clay Connection Retreat in July, was a challenge named 820 (for August, 2020). Each participant determines their own challenge and the project or product. Each Saturday, we meet online to describe what we've done during the past week, and how our project is coming along. My project is to try to push my envelop a bit. To do so, my aim is to make one pendant a week, trying something new I haven't done before. In addition, I also plan to use at least 2 different textures, 2 different colors and 2 different shapes in each pendant. Below are photos of my pendants for week #1. You may notice that I used some of the sheet I created in the previous cane challenge to make the football shaped piece in the 3-part pendant. The black and white pendant is something I've never tried before.

Saturday, August 15, 2020

Polymer Cane Challenge

So many things have changed or been put on hold due to the pandemic. One of those "things" was the biannual Clay Connection Conference sponsored by the Southern Connecticut Polymer Clay Guild. So instead, we held a very modified gathering via Zoom. It was well-attended and people enjoyed both the activities and being connected with other polymerists. In fact, it was so much fun that a couple of different "challenges" emerged from the Zoom conference. One was a polymer cane challenge, where participants were challenged to try a new polymer cane and then share their results. The other was called the 820 challenge (for August, 2020) in which people had to choose a personal challenge involving polymer and produce something toward their project each week for the month of August. I joined the 820 challenge, and will share my project and results in another posting. I also joined the first cane challenge, and am bringing you those results today. The photos on this page show various aspects of the cane. We started with two 3-part skinner blends to create triangular canes. These canes could then be sliced, reshaped, and formed into more complex canes.
I also played around with slices, making beads in different shapes and sizes. Finally, I used some of the scrap to make a patterned polymer sheet. Part of this sheet has been cut out and I used it in one of my pieces for the 820 challenge. You'll see that in another post soon!

Monday, July 27, 2020

Summer Challenges!

As some of you are probably aware, for a few years I have been teaching polymer clay classes. Once a month, I would pick a topic and meet with interested participants to show them a new technique or concept using polymer clay. When the pandemic hit the US, my classes were put on hold, with the hopes that we'd be able to meet together again soon. As time has gone on, it's become obvious that we are still in a holding pattern. So, I decided to offer a monthly "polymer challenge" to those who had been taking my classes and were interested in doing more. In June, our first challenge was to make a bead out of polymer that was new or different for that particular artist. We had a zoom meeting to share our creations and catch up with one another. It was a lot of fun!
For July, the challenge was to create something with a summer theme. The projects people chose to make were as varied as the group! The image here is a magnet I made for my July challenge project. I used embossing powder inside translucent clay for the ocean, and embossing powder on the surface of translucent and ecru for the beach. The waves were the real experiment for me. I wanted to have clay that was super soft and almost like paint. I mixed white, translucent and liquid clay until I had a consistency I wanted. Then I rolled snakes of this mixture out, and pressed them into the base using a couple of different clay tools. For my first attempt, I'm pleased with the way the waves look. I'll be working on other scenes with this mixture in the future to see what happens.

Monday, July 20, 2020

Inchies!

Inchies are small, one-inch square polymer tiles.  They are usually used at polymer clay events for swaps among the participants. In this way, each participant goes home with tiles that remind of the other people, the conference, and might give them ideas of something they could try themselves. Inchies don't have to be elaborate, and they don't have to take a lot of time either, especially when you are making 50 or more to swap with others at a polymer workshop or retreat.  This year, since the Clay Connection is being held virtually, participants are making one inchie each, photographing it, and sending the photo along to Cat, a member of the SCPCG.  Cat will be making a collage of the photos, so we can see all our art work together on one place.  So, here is my inchie.
Since I only needed to make one, I was more elaborate than I usually would be.  Often, Inchies are cut from a large sheet of polymer that the artist has covered with a sample of a particular texture or technique, such as mokume gane or stenciling.  I'm really looking forward to seeing what other folks have done.

Saturday, July 18, 2020

SCPCG "Virtual" Bottles of Hope

Usually, July signals that it's time for a polymer retreat in Connecticut or New Hampshire.  These
retreats are hosted by the polymer guild from that state, and are offered in alternating years.  This year, the Southern Connecticut Polymer Guild (SCPCG) was all set to offer their usual 4-day polymer Clay Connection.  Sadly, the current pandemic has intervened, and SCPCG has decided to offer a virtual retreat.  In addition to demo lessons, raffles, challenges and games, the Connecticut retreat also features a Bottles of Hope challenge.  Bottles of Hope are small glass bottles covered with polymer clay and given to cancer patients.  They symbolize a wish and a hope for health.  This year, instead of making the bottles during the retreat, online participants are making bottles, taking photos, and sending the photos in so that they may be displayed online for all participants to see.
I found a couple of special small bottles that I thought were perfect for this purpose.  The bottles are sort of an hourglass shape, and came with cork stoppers.  Here are the two bottles I decorated with polymer clay.  You'll notice that one bottle is very exposed.  You can see its shape clearly, and also see the vine-like design going around the bottle, visible through the glass.  I almost completely covered the second bottle, though I did leave the bottom open to allow peeking inside.
The Bottles of Hope project is ongoing, and has spread across the US and in other countries. Perhaps there is a polymer guild or group near you that is also participating in the program, and you might decide to decorate some bottles for them sometime.  It's a fun project, it's creative, and it means a lot to the recipients.

Search Results

Web results


Tuesday, June 30, 2020

Summer Colors with a Hint of Glam

Here is a great little necklace that will work perfectly for summer - and take you right into fall.  The graceful teardrop beads have a flat black backing.  The tops of the beads catch the eye with various shades of purple and aqua, overlain with shapes of gold-leaf composite.  A final coating of Magic Gloss resin makes a strong, glossy surface, that will reflect sunlight and lamplight equally. Swarovski glass pearls in a complimentary gold finish pull everything together. The clasp is gold-filled with magnets, designed to be secure, while allowing for easy on and off.


Monday, June 29, 2020

More Dots & Lines


As I mentioned in an earlier posting, I have recently started experimenting with some of the uses of Sculpey liquid polymer. Although I've only used white and black, this product now comes in many colors.  It has a density that allows it to hold a certain amount of dimension when baked.


 Here are a few more pieces I've made in the dots and lines motif.  I used the flat (non-blade) edge of a tissue blade to make the lines, and a narrow head pin for the dots. The lines and dots feel raised when a finger is drawn across the surface.

Saturday, May 30, 2020

Mokume Gane, Gold & Glitter

In March, I shared a couple of polymer sheets that were made using the mokume gane technique on layers of white polymer clay covered with pan pastel colors, a sheet of composite gold leaf, and a piece of lace impressed into the clay layers.  I have made a couple of other sheets, and I've been making earring sets with them.  The earrings in this post have all had a resin layer of Magic Gloss added on the surface. This helps protect the gold leaf, adds dimension and depth, and lots of shine.


Thursday, May 28, 2020

A New Cuff!

A few months ago, I purchased a bracelet cuff tutorial from Bettina Welker, an outstanding German polymer artist.  Among other things, Bettina is known for her clever hidden closures, clasps, and hinges.  I really like cuff bracelets, but usually they have to be slipped over a person's hand and then they may, or may not feel right on the wrist.  This new design allows you to create a more custom fit that does not have to slide over the hand.
Today, I'm sharing with you my first cuff using her tutorial.  Now that I know how she created the closure, I have plans to create more using my own designs and ideas.  Her tutorials are available on her website under the heading "Instructions"  :  https://bettinawelker.de/anleitungen/   Below are 3 photos.  One shows the cuff from the front, one from the back, and one shows part of the closure.


Sunday, May 24, 2020

Dots & Lines

It's amazing how easy it is to fill one's time, even when you're in the "stay safe, stay home" group.  I start off the day with a list of things I plan to do, and somehow don't seem to make it all the way through. One of the things I keep planning on doing is getting more polymer work done, and sharing the results here.  So today, I'm going to show you my first two pieces using a technique that Lynn Yuhr shared on Polymer Clay Daily during 2019.  I've used pan pastels to create blended colors on the bases, then, used liquid polymer for the dots and lines.  These two pieces are pins, though they could have been pendants, too.  I also used the liquid polymer to color, smooth and finish the edges all the way around.  This is a lot of fun, especially since the dots and lines are not completely under your control, and I like the slight raised effect the liquid polymer makes.  I'll be making some more pieces soon, so stay tuned!


Thursday, April 30, 2020

New Earring Styles

Hello!  I realize this blog has been quiet for a few weeks.  With all that has been going on in the world, I have been pre-occupied.  Just recently, I have begun to feel some inspiration to "play with clay" again, and have been making some earrings I'd like to share.  The first two pairs are some of the longest earrings I've made:  3-D triangles of deceasing size, all connected separately for maximum motion.  The lighter set is made from one of the pastels, gold leaf and lace sheets I made and spoke about in an earlier posting.  The purple set on the right is made from an Ikat cane.


These next three pairs of earrings are a different form of 3-D triangle.  I've used this shape before.  The difference here is that I've used a contrasting solid color for the inside of the earrings.  This pop of color really makes the earrings seem to glow from inside.  I've posted 2 photos here - one a front view, and one to give a better image of how the inside looks in contrast.

More earrings soon!  Be well.


Saturday, March 21, 2020

A Couple More Concave Ideas

I realized I didn't post a couple of photos from the pieces I was making when I was experimenting with the concave concept.  So, here are some earrings and some pins along the concave theme.

For the pins, the background piece is textured to provide both contrast and interest to the pieces.  I used different techniques for each of the concave rectangles.  The blue one is an ikat stack, the brown one from a mokume gane sheet, and the gold and cayene pin was made using the imbedded lace mokume gane technique I talked about in my last post.  It's amazing how different - yet the same - the pieces look using different techniques for the curved section.
These earrings have a really long dangling wire holding the 2 concave pieces at the bottom.  I also embellished with crystal rounds and gold-filled beads to add some interest.  You can't see it in the photo, but the inside of the curved pieces has designs from canes or stacks.


Friday, March 13, 2020

Lace and Metal Leaf Mokume Gane

How did it get to be March?  We've had an unusually warm month so far, which has been helpful as we help our puppy adapt to a different toileting regime.  She had a wonderful time visiting with the folks at our February workshop and can't wait to see them all again.
At that workshop, we experimented with using thick lace pieces to impress a design into the clay.  We used the type of lace that makes lovely trim, rather than flat lace that is often used for sleeves or as an overlay on another fabric.  We also incorporated composite metal leaf as the top layer of our thin clay stacks.  This meant that, after impressing the lace design, we skimmed off parts of the metal leaf and the design of the lace came through.

Here are photos of sections of two sheets I made. The polymer sheets are eventually rolled out on a #3 or #4 on an Atlas machine, so you end up with a very flexible sheet with the metal leaf imbedded into the clay.  Adding a good backing would allow one to make lovely jewelry pieces.  However, I also think these sheets would be great as a cover for small paper mache' or cardboard boxes, or other items you would like to cover.  It was a fun and interesting process, and the sheets people made in class were simply lovely.

Saturday, February 8, 2020

Marquetry Sets

I really do like the way marquetry looks in polymer, and I like creating it even more! Here are some pendant and earring sets I made for the Westerly Gallery.  I like the more delicate look of these pieces.
Sometimes, as in the blue/purple set to the left, I use a Skinner blend for the background, and cut shapes from canes or sheets with complimentary colors.


This set has a feathered background, so the inlay pieces are less patterned than in the set above.

The background on the green and brown set is a striped Ikat.

Monday, February 3, 2020

Going Concave

As I believe I mentioned in an earliery post, the Westerly Gallery January show had the theme: Exploration:  New Perspectives.  One of the things I decided to try was to make pendants with a concave rather than convex form.  This meant that, instead of the center of the piece rising to the eye, it would recede.

I had fun working with different shapes, mixing and matching patterns, colors, and textures. You will notice for several of them I used the mokume gane technique, and several of the pieces incorporated metal leaf.

Below are more of the pendants I made.


Sunday, January 26, 2020

Puppy, Again!!


Over the years I've kept this blog, I've posted when we've add to our little "family."  Just a day ago, we brought home another Aussie to join our two older girls.  Let me introduce Keiko, shown here with two of her litter-mates as she was getting ready to come home with us.  Her name is a Japanese girl's name that translates as "happy child, rejoicing."  This is indeed one happy, playful pup, and we're all enjoying getting to know her and watch as our group makes
modifications to give her room to grow and fit in.

Of course, this is my creations blog, so I thought I'd show you a couple of pairs of earrings I just finished. They obviously have nothing to do with the puppy, they're just earrings, but shouldn't each posting have some polymer in it?

The first blue pair below has a thin gold plated bar that swings back and forth as you walk.  This is the first time I've used something like these bars in earrings.  All the patterns were made using Mokume Gane technique with gold leaf inside the layers.  There is a quite a sparkle to the gold, it just doesn't show well in the photos.