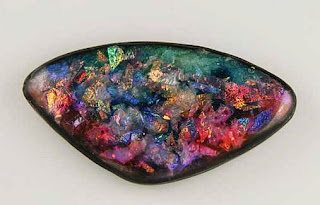
A few days ago, I was giving a polymer workshop on making dichroic glass looks with polymer. I use a combination of techniques I've run across which combine composite metal leaf, translucent clay, alcohol inks, texture sheets, glitter, and Magic Gloss. I particularly like the way texture and designs look when impressed into this layered mix. It is also possible to just let the colors and shine "do the talking." This first photo shows two pieces with designs impressed from past postings, and a new fall-toned piece that just seems to glow from inside.
One of the workshop participants had purchased some iridescent flakes and wanted to know if they would work with this technique. Having played with flakes just a little in the past, I knew they would not accomplish the dichroic look we wanted. His question, however, made me wonder what would happen if I combined flakes with the dichroic bases we had made.

So, when I got home, I did a little experimentation and thought I'd share it here. This first picture is of one of the clay bases I'd made in blues, purples and reds.
The next photo on the right shows two pieces. The pink piece with the blue tip was made by sprinkling pink iridescent flakes on the base from the cut out and adding some liquid polymer. The green piece was made from mint colored flakes on a deep green and olive base. Some of the base color shows through the flakes a little, but the glitter doesn't show except around the edges, and on close inspection, the metal leaf is not apparent at all.
The final snapshot below is a piece made with blue tinted iridescent flakes over a base from the same sheet (above) that I used for the pink piece. This piece has much more color variation than the other two. Since the base was similar to that in the pink piece, I'm assuming the blue flakes are the main reason for the color variations. I like this piece the best.
 Sometimes, you just don't know where you'll end up.
 I wasn't done yet, though. I still had a couple of slices from Ikat canes. Here are the pieces that resulted from using those canes to make more horn shapes. Kinda neat - and tons of fun!


