Thursday, July 5, 2012

New Cuffs

Thought I'd post photos of a couple of brass cuff bracelets I just finished.  They are totally different in design from each other, and are unique in that I tried something new with each one.  The pink cuff has a 3D floral arrangement on the top section.


The green, yellow, and turquoise cuff has a Swarovski crystal in the new leaf shape imbedded  at the top.


I really like the way these both turned out.  I fully expect to experiment more with these ideas in the future.


Wednesday, July 4, 2012

Resin & Silk Screened Polymer

Over the weekend, I taught a workshop on silk screening on polymer.  The group did an excellent job.  They caught on so quickly I even had a chance to make a couple of sheets, too.  After I got home, I worked the sheets up into some jewelry pieces, and decided to see what the Magic Gloss resin would do with silk screened work. Although I use heat set acrylics that set well when baked, it's not a bad idea to protect painted surfaces, and I figured the resin would be a perfect finish.
What I hadn't realized was the domed surface would make the painted portion look almost 3 dimensional.  The light violet on the teal pieces almost looks like the leaves are floating over the surface.  A very nice effect.

Experimenting With Resin

Resin creates a clear, high dome on baked polymer.  It enhances depth and adds high gloss to the piece.    I haven't done much with resin, so I decided to experiment with Magic Gloss from Lisa Pavelka.  This is a one-part resin, so there is no mixing or concern about having the correct amounts which is the case with the 2-part resins. I made some mokume gane stacks in different color combinations, and used resin on some of the pieces I made from each stack.

The process took quite a while. The resin tends to pool in round or oval shapes, drawing away from the edges. This meant I had to put several layers of Magic Gloss on each piece, baking the layers under a UV light, to ensure the resin covered the whole surface.  I also learned that flat pieces are much easier to cover than those with slanted or rounded edges.

As you look through the images in this post, you'll notice some of the pieces are covered with resin while others were left matte.  The resined pieces shine and glow.  The resin does seem to intensify colors, and also to darken them.   It seemed that light colors, such as white and yellow in particular, were affected the most.  This information can make a difference in the colors you might choose.

Tuesday, July 3, 2012

Butterflies

I've been meaning to try my hand at butterflies.  I loved making dragonfly wings (see 7/13/10 post), and decided to try making a butterfly cane or two.  I wanted these to be able to be 3D to a certain extent, so did not encase them in translucent.  The original shapes were over a couple inches wide, and I found reducing evenly to be a bit interesting.

So, here are my first butterflies. I made the monarch wing sections first.  Then I made some lentils from slices of the wings, swirled them about, and placed a little butterfly on each.  These were just the right size for pendants, so I put sterling bails on them.

Then I decided to make a yellow butterfly.  It's not really a swallowtail, just yellow.  I made a swirl lentil, then decided to play with a different shape. Here's what I came up with.  I'm not sure what to call this shape - any suggestions?


Finally, I decided to make some lentils with flowers AND butterflies.  Here are a few:


Saturday, June 23, 2012

Falling Petals....


Leaves fall in autumn, petals fall in late spring.  Hence, the inspiration for these pieces.  I started with the 2 wavy-edged leaves and the flowers just begged for some drifting petals. These two just didn't seem like pendants, so they became pins.

As I was tinkering around with them, I just happened to put them together in such a way that they spoke: "bracelet!"  So that's what I tried next.   These 2 cuff bracelets have a small armature at the join, but are otherwise all polymer. I'm looking at different ways to add a clasp of some sort of it seems necessary, and to see how they wear.

Friday, June 22, 2012

Flower Clusters

As you can tell from the picture at the left, I really like this cane I made. I got carried away making flowers from this cane, and started making little bouquets.  I'm not sure what I'm going to do with these little flower clusters - probably pendants of some sort. One has plain flower centers, the other has crystals at the cores.

I decided to make a pendant with fewer flowers, and added some leaves as possible locations for chains or other necklace straps.  Then I had to make it again in another color combination of the same cane.  The crystals in the centers are chrysolite.  This aqua piece has already been claimed by a bead-weaving friend.  I want to see what you do with it, Anita!

Thursday, June 21, 2012

My First Zinnias

 These are my first zinnias.  It was interesting to work on the layers.  I made petal canes that I left in 3 sizes.  Then I started in the middle and built the flowers in both directions.  I really didn't know how large they would need to be to look "complete", so I started with a medium circle of petals, and lay progressively smaller petals, working toward the center.  Then I added larger petals along the bottom until I was satisfied with the shape and size.


In looking at photos of real zinnias, I was intrigued at the various different little petals that circle the center.  I chose the little swirled pre-petals to use in these samples.  They show up especially well on the red and white zinnia.

Tuesday, June 5, 2012

Floral Brooches


More florals, yes, I know. I'm stuck on flowers right now  - and thoroughly enjoying it, so it must be a good thing. :)  They're all a bit different. Some may resemble real flowers from our gardens, others are just my interpretation of what a flower could be.  The colors are all mine.  This first set shows 3 very different pieces.  All but the yellow/coral piece are pin/pendant convertibles.  I like the idea of giving someone the flexibility of wearing a piece as a necklace or a brooch.  This just creates a lot more options.
The next piece reminds me of gladiolus.  Given all the colors they come in, I figured my mix probably exists "out there" somewhere.  This piece originally was supposed to be an off-center necklace, but the wire I was using was too soft to handle the weight of the clay. So, the piece became a pin.  I'll try my idea again when I find something less flexible for a base.

Here is another variation on a starburst I first tried a few weeks ago.  For some reason, this particular design created with this particular cane almost looks like it's in motion.  I really like this design.

Finally, here is another of my "special" triangular shaped flowers I developed one day while playing with petal shapes.  The blends and fades from yellow to violet really makes this piece come alive.

Sunday, May 20, 2012

Summer's Coming!

Yea!  Summer is just around the corner, and it's time for some bold new colors on your wrist! Here's a new cane made up on brass cuffs in some of the latest colors for the summer season.  Can't you just picture the outfits to match?

Saturday, May 19, 2012

Sweet Little Floral Jewels


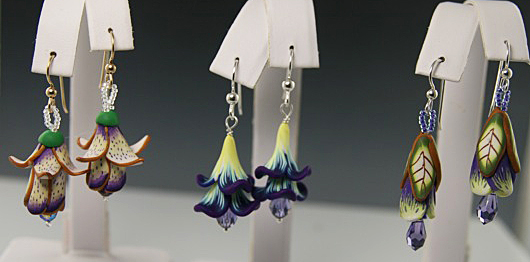
I have really enjoyed making these little flower and jewel earrings.  When they're all lying on a mat together, they make the loveliest garden!


The colors for the canes are all custom mixed, and I'm really pleased with the way they turned out.


I left the flowers and leaves with a matte finish to provide contrast with the shine of the beads, crystals, and pearls which form the centers of each flower.


You'll see different flower designs:  trumpet styles, closed flowers, calla lilies and a fuchsia. Do you have a favorite?

Thursday, May 3, 2012

New Flower Shape


I enjoy making flowers in polymer, especially when they're blooming all around me outdoors.  And I love manipulating clay shapes to see where they might go.  As I was playing with petals, and shaping them into flowers, I tried pushing and folding the clay and came up with a new shape and flower.  I realize this is probably a shape someone else has also "discovered" yet it's new for me, so I'm calling it "my" shape.


I've used it in both 6 and 8-petal flowers. The 6-petal flowers remind me of trillium.  Perhaps the 8 petal flowers are a new strain of dogwood? There is an example of this shape in my April 27th posting. I like the 2 layers of petals, and their differing sizes.  I also think it's a perfect application for the "crushed wedge" cane I like making so much.

As you can see, I had to start experimenting with the center of these flowers, too. Great place for a rose!

Wednesday, May 2, 2012

Roses, Roses, Roses

May brings intense lime green leaves to our trees here in New England, and they are a brilliant accompaniment to the spring flowers in bloom everywhere.  Nature is definitely influencing my polymer work these days, as you can see by the photos here.

Today I'm sharing roses.  They always remind me of Mother's Day, which is just around the corner.  The best thing about these roses is they never fade.

I've been mixing some colors which are in keeping with the new palettes for spring and summer.  That's another thing I love about polymer - there is no end to the colors you can create.  I'm especially enjoying  the purple and lime combinations.


I hope you are enjoying a lovely spring, wherever you live.