Showing posts with label 3-d shapes. Show all posts

Friday, September 20, 2019

Another Great Class with Helen!

As I mentioned in an earlier post, at Clayathon 2019 I had the opportunity to take a vessel making class from Helen Wyland-Malchow.  It was a really great class, and I learned to do something I've never tried before.  In that class, Helen wanted everyone to experience slab construction of shapes using polymer clay, and that's what I did.  However, she had some vessels she had made in a trapezoid shape with triangular bases. The shape just captivated me, and I really wanted to try it sometime.
When I found out that Helen was going to be offering the same workshop in Connecticut, I asked her if I could take the class again and do the trapezoid shape instead.  She agreed to let me do just that, and said she'd be glad to help me.  
I had a wonderful time.
The photos here are shots of the 2 sides of the vessel I made.  I'm really pleased with the decorated sheets I made, and with the way the shape turned out.  Even the top is fun!

Sunday, July 19, 2015

More Master Class Camp with Eugena Topina

After having spent 2 days with Eugena Topina making those amazingly versatile stamping tools, I was pleased to have a second class with her.  Due to personal circumstances, one of the scheduled presenters was unable to attend, and Eugena graciously offered to teach a class to fill that void.  I'm delighted she did!  This class was a brand new one for Eugena, and took us off on an adventure with organic shapes and textures.  I've not done much work with organic shapes, so this class really helped me try something new.  Keep an eye on her website:  http://www.eugenascreations.com/  I'm sure she'll have a new tutorial for this process soon.  It's really fun and creative!
We started with white clay, though we could have used colors if we wished.  Knowing we would be colorizing things later was a good reason to stay with pale colors or white, especially for our initial experience with the process.    Eugena guided us through shape formation and introduced us to a myriad of texturing techniques.  Every design and texture in the pieces you see here was made by hand, following methods that Eugena has developed.  Most of them used everyday tools or items that would be easy to find.  Eugena is very imaginative.  The results were amazing and the whole process was a lot of fun!

After making several of the rounded shapes, and playing with various texture concepts, we experimented and created some shapes of our own.

On the second day of class, we dove into colorizing our pieces. As you can see in the last 2 photos here, I tried some organic shapes of my own and had a grand time with colors!  Thank you, Eugena, for a great class!

Saturday, April 25, 2015

Necklace #2: Flowering Vine

Although this type of sectional design has been used in necklaces in a variety of different mediums, this is the first time I've tried it myself.  I like the way the sections move and change size, while the pattern or design flows from one section to the next.

I love flowers and vines, and thought they'd work well in a sectional design.  Of course, I had to make a Skinner blend for the base.  The vines continue from one piece to the next.  I chose to make the background move from light on the ends to dark in the middle, while the vines start with just leaves at the ends and progress to blossoms with variegated colors as we move toward the center.

The closer view below shows the texture on the base. Perhaps you can also see there is a leaf and a flower that extend a bit beyond the base pieces.  I wasn't sure how that would work with pieces that were hooked together and moving.  Now that I've made this piece, I plan to make others and extend more of the decorative components beyond the base.  I think it adds interest and more dimension.


Saturday, October 12, 2013

It Started with Snails.....

Sometimes, you just don't know where you'll end up.
I'd been playing with some partial blends - blends where the individual colors still stand out - and twisting them around.  This made me think of snail shapes, so I made up some snail pendant and earring sets.  I love the way the twisted patterns turned out, and the colors are warm and vibrant.  Wish the snails in my yard looked like this.  ;)


I picked up some of the clay pieces I'd cut off, and found myself shaping this yellow and red pinched pendant.


I let my hands fiddle with more pieces and suddenly these curved horn pieces emerged.  Making them in graduated sizes resulted in a pin and a pendant.
Along with this really nice rainbow pendant with pearls instead of a pot of gold.
I wasn't done yet, though.  I still had a couple of slices from Ikat canes.  Here are the pieces that resulted from using those canes to make more horn shapes.  Kinda neat - and tons of fun!

Wednesday, August 28, 2013

Soft, Sweet Transluscents


I love the effect of translucent polymer.  This clay imparts a softness - almost a cloudy aspect to the pieces. It's not easy to see on the screen, but in person there is a luminescence in translucent pieces that is simply lovely.

One of the canes I enjoy making with translucent is the chrysanthemum or "chrissy" cane. I most frequently make this with a Skinner blended translucent layer and a solid white, thinner layer of clay.  These layers are rolled up jelly-roll style with indentations made by a credit card or similar item, and voila! Your cane is ready for use!
The pieces in this post were made with translucent solids and a few different translucent and white chrissy canes.  The bracelets above and the earrings on the right were all made from chrissy canes that shaded from yellow to green to purple to fuschia.  As you can see, mixing these colors with translucent softens the hue.

The earrings on the left were made with another color combination.

These 2 bracelets below were made from very different color pallets.  The upper cuff has dusty purples and light rose colors while the lower cuff is oriented a bit more toward fall:  copper, greens and rust.

Translucent polymer has myriad applications in layered applications, too. If you haven't explored this particular clay, you have a treat in store.

Here are two more pairs of earrings in different styles. Pendants coming soon! Stay tuned.


Monday, July 15, 2013

New Brass Bracelet Forms

I like bracelets, and have made several bangles in all polymer as well as bangles and cuffs using brass channel blanks.   One of the problems with a closed bangle is sizing, since peoples' wrists vary widely.
Recently, I've found some brass bracelet forms that have given me some fun options for design. Here are some of my new pieces.
The red and yellow flowers were formed a petal at a time and pressed through the brass filigree to secure the flower to the base.  I particularly like these bracelet forms because they have a well constructed hinge. This makes opening and closing the bracelet very simple, and helps ensure the piece stays on. The filigree is a nice touch.

These last three bracelets were made on a different bracelet form, one with 2 thin brass bands.  These bracelets are very easy to put on and take off, but I wanted to be sure they wouldn't come off too easily during wearing.  I found a magnet and clasp combo that works just perfectly in the opening on these bands, and makes a nice "safety" chain.  The polymer flowers and leaves are on both sides of the brass bands, securing the design to the base.

 I think these bases work perfectly with polymer, and I'm pleased to have found bases that support 3-dimensional work.

Wednesday, May 15, 2013

Floral Swirls

As you've seen in recent posts, I've been playing with circles and wavy shapes.  It's fun exploring something a bit different - or at least different for me.  Earlier this week, I taught a workshop on a petal cane made from bull's eye wedges.  I loved what the students in the class developed, and came home with a new cane of my own.  What to do with it?  Somehow, the ideas of petals and wavy shapes merged, and I came up with these floral swirls.   I made the swirling vines out of Kato clay to give the pieces a strong and flexible base.  The flower petals are made of custom-mixed Premo! colors.


Once I had the floral swirls assembled and baked, I knew they needed something special in the centers.  I had planned on using pearls or crystals, but they just didn't "do the trick."  Looking through my stash, I discovered I had these tiny micro-beads, so decided to give them a try.  I think they work perfectly. I've strung these pendants on simple chains, through they would look good on wire or even a thin ribbon.   Light and airy, I think they're perfect for spring and summer wear.


Sunday, February 10, 2013

Criss-Cross - A Different Shape


As many polymer people know, it's fun to play with the clay, exploring different options and possibilities.  I've recently developed a new shape, and have been "claying around" for a couple of days.  The photos here show several pendants made with different surface techniques, all sporting variations on this new shape theme.  The two to the left were made with mica shift sheets.  You'll notice that one has a single criss-cross while the other has none.

The next photo shows 3 more pendants, one with criss-cross at the top, one with criss-cross at the bottom and one crossed in both places. Canework, textures and mokemu gane were used for the surfaces.

The last picture has some criss-cross earring to match the pendant, using the torn paper technique.  I don't know what else I might do with this shape, and it certainly has been fun experimenting.  

Monday, January 28, 2013

Some New Shapes

Sometimes, I just like to play around and see what transpires.  I'd made a mica shift Skinner blend for a demonstration, then needed to make something with the sheet.  This necklace and earrings were the result.  A new shape, and I like the simplicity of the pearls.


Next I was in the mood for some black and white, so made a mokemu gane stack with black, white, silver and silver leaf.  Of course I needed to do something with it - thought I'd share some of the shapes I've come up with.   This first set is composed of 3 layers of triangles, each layer with a different treatment.  There is silver mica shift, the multi-color mokemu gane and black textured.


These earrings are open at the sides and the shape clasps an object at the bottom. The black pair has pearls while the mokemu gane pair holds jet crystals.

This last pendant is a curved triangle with a smooth, solid backing.  I like the neck cording, but haven't quite decided if that's going to be "it" or not.

I've a few more in the oven - I'll be sharing  more later.

Sunday, December 2, 2012

Mokume Gane Cylinder Pendants

I really liked the cylinder pendants I made a few weeks ago, and decided to make some more in different surface treatments.  I first turned to mokume gane. It's one of my favorite techniques, possibly because every time I use it, the end result is different. The color combinations are usually custom-made, and I vary the objects I press into the polymer stacks, so I always get an unique look.
The pendants on the left demonstrate 2 different impression techniques.  On the purple and pink cylinder, I used a deep cut rubber stamp to make the impression in a rather shallow stack.  The aqua cylinder was made from  a tall stack that included composite silver metal leaf.  I used a variety of metal and wooden objects pressed into the stack to create the pattern.  While the left pendant was hand sanded and buffed for a satin shine, the pendant on the right has a coat of acrylic varnish.  When I use metal leaf in pieces, I like to add a protective coating to guard against possible tarnishing of the metal.

The pendants on the right also represent different techniques.  The red and white pendant has layers of gold composite metal leaf sandwiched in translucent, with a design created from curved metal bands and hollow tubing.  Rubber stamps were used for the patterns in the other two pieces.  These pendants are fun to wear and the metal tassels add a touch that swings as you move.

I'm in the midst of another surface look in cylinder pendants - stay tuned!

Thursday, August 23, 2012

Summer Feathers

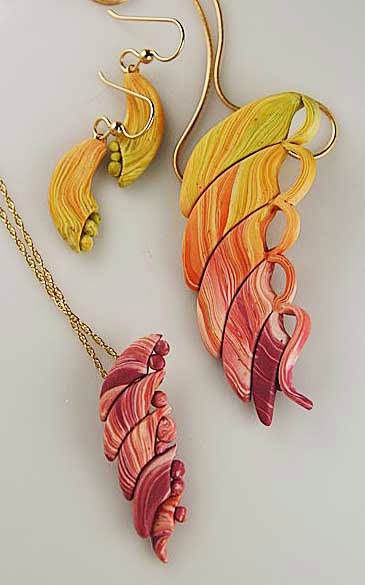
Besides flowers and leaves, some of my favorite items in nature are feathers.  I used to make a lot of beaded feathers, though I haven't done so in quite a while.  The other day, I saw one of my old feathers, and decided to try making a feather cane. There are numerous methods for making feathers in polymer, and I picked one from Dora's Explorations which she posted back in 2008.

The photos here show three different color blends combined into feather canes.


The pendant has a mica shift background and the gold covered cable is a perfect compliment. 


The earrings all have some motion, especially the ones with triple leaves.


I expect I'll be experimenting with other feather caning ideas, so stay tuned. 

Saturday, August 4, 2012

Two New 3-D Earring Styles!!

As you probably can tell, I really like 3-D pieces, and enjoy creating them.  It's such fun to feel the clay move and form into new shapes beneath my fingers.  Over the past week or so, I've been working on a couple of new earring designs, and I'm really pleased with the way they've turned out.

The first design I call "curved moon pillows."  These round little shapes have a small opening and indentation where the ends meet, and it creates the perfect spot for dangling decorations.  Of course, I also made some matching brass cuffs.


It was fun to play with a variety of color combinations, too.


The second design is a series of curved drops.    Actually, the curve seems to be equally "comfortable" at both the bottom or the top of the shape.  These earrings are made from a new petal cane I decided to try.


 I'm working on some larger single drops, and some which use beading.  I'll share more later.

Hope you enjoy these new pieces.

Friday, June 22, 2012

Flower Clusters

As you can tell from the picture at the left, I really like this cane I made. I got carried away making flowers from this cane, and started making little bouquets.  I'm not sure what I'm going to do with these little flower clusters - probably pendants of some sort. One has plain flower centers, the other has crystals at the cores.

I decided to make a pendant with fewer flowers, and added some leaves as possible locations for chains or other necklace straps.  Then I had to make it again in another color combination of the same cane.  The crystals in the centers are chrysolite.  This aqua piece has already been claimed by a bead-weaving friend.  I want to see what you do with it, Anita!

Thursday, June 21, 2012

My First Zinnias

 These are my first zinnias.  It was interesting to work on the layers.  I made petal canes that I left in 3 sizes.  Then I started in the middle and built the flowers in both directions.  I really didn't know how large they would need to be to look "complete", so I started with a medium circle of petals, and lay progressively smaller petals, working toward the center.  Then I added larger petals along the bottom until I was satisfied with the shape and size.


In looking at photos of real zinnias, I was intrigued at the various different little petals that circle the center.  I chose the little swirled pre-petals to use in these samples.  They show up especially well on the red and white zinnia.