


 Perhaps you can tell from the title of this post that I have been enjoying an earring-making binge. It really got started at a workshop with Marie Segal from California. Thank you Marie! If you ever have a chance to take a class from Marie, or to get her book, do so! She is filled with information and ideas that don't quit.
  The round disk-shaped earrings demonstrate the translucent qualities the best. Light shines through these earrings from the back, giving them an overall glow. The blue and purple earrings have colored translucent swirled on top of clear. Marie showed us how to make narrow tubes of swirled lines and I couldn't resist making the leaf shapes with them. The aqua earrings have a smaller disc of pressed gold-leaf composite, and these discs really sparkle.
 The pairs in red and gold highlighted both the true red color of the Cernit clay, as well as some other techniques that Marie helped us develop.


 I love the warmth and glow that translucent clay imparts to a piece. Recently, I made a couple of blended "cell" canes that have a lot of translucent in them. I call them cell canes because they remind me of a group of cells clustered together, or perhaps a bit like the inside of a bee hive. Each "cell" is a bull's eye blend fading to translucent, with a white polymer wrap around it. Of course, once you've made a cane, the next challenge is to use it. I decided to make hollow tube beads, keeping the irregular edges as part of the shape. I made a set which I combined into a necklace. I had done a similar necklace with this type of cane a few months ago in a different color combination. I really like the way the navy pearls and light blue crystals complement the tube beads.
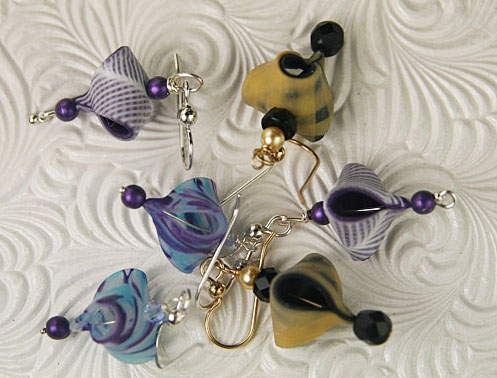
 Just for fun, I decided to try something a bit different. I made just one larger tube, and figured out a way to hang some chains with pearls from the inside of the tube. The results are shown here. I really like the way these turned out. I particularly like the look of something hanging from inside the tube, and will have to give this idea more time soon.
 Here's a photo of a necklace I made recently with a holiday party in mind. The glow of the pearls and the sparkle in the crystal rondelles picks up the glow and shine from the silver and translucent disks of the focal piece. The colors of the clay and the pearls are much closer in person. Light, and fun, it lies nicely on the neck. I find it especially fun to roll the disks out super-thin and then gently press the edges to see what shape the disks take. No two are the same, that's for sure!
 I had to share this latest lei style necklace and earring set with you because I really like the way the colors worked out. I'm showing you the close-up first, so you can see the outer copper clay color, and the translucent in-between the circle swirls of copper. The translucent has been lightly tinted with a clear embossing powder and I added some copper glitter to the mix, too. In person, there is a special sparkle and glow from the beads that is repeated in the glass O beads and goldstone flat spacers placed in between the ruffled beads. It's really pretty, and perfect for that special outfit, or just for fun. I'm also including a photo of the full necklace. The design just didn't come through as clearly as in the close-up.
 I'm dropping by to share a couple of pendant & earring sets I just finished. I made these from the mokume gane stacks I used for demonstration in the workshop I mentioned in my last posting. You can see the difference between the pieces shown here, using gold composite leaf, and the cuff bracelets in the last post that were made with variegated leaf. I really like the almost watery effect that the lightly tinted translucent clay makes when it is over composite leaf. As you may be able to tell in the photos, the pieces I made using the variegated leaf look more like slices of stone. The teal pieces shown here have the appearance of looking into small pools of water. I also had fun creating openings in the teal pieces and adding the sparkle of some crystals. The finish on the green and pink set is Magic Gloss, while I used PYM 2 on the teal set.
 Recently, I was teaching a mokume gane workshop using composite gold metal leaf. One of the participants mentioned they had seen variegated metal leaf and wondered when that might be used. Our conversation got me thinking about using the variegated leaf in mokume gane with translucent clay.
 So I decided to experiment a bit. I wanted the clay to reflect the variegated color. Rather than coloring the translucent clay with alcohol inks or pieces of opaque clay, I decided to use embossing powders and micro glitters. I thought this would allow the translucent to remain more transparent, while still adding color and sparkle. I decided to use these sheets on some brass channel cuffs I had. The photos here show the various effects and colors I achieved.
 As I was making more of these items last night, I realized I haven't shared this particular project on this blog. These are glass nail files, the type used in quality salons, and they make great gifts.

 So - on to the clay. As you know from my last post, I have been working with polymer, metal leaf and alcohol inks to make pieces with color depth and variation as well as some crackle technique. After I make the colored sheet, I pick and choose the areas I especially like, cutting out the pieces I want. However, there are always good-sized areas of the sheet that are "left over." I had just made some sheets for the demo at the Westerly Gallery, and now I had some pieces cut out and a good section of the sheet just looking at me. An idea struck: why not use the left over sections, which I didn't find interesting enough to stand on their own, as background to translucent canes? Since I love translucent clay and have several little translucent and white canes already made, I decided this was a perfect solution. I would have some new pieces with a different look while using up the metal and alcohol sheets. Nothing goes to waste with Translucents to the Rescue!
 Here is a side-by-side comparison of some abstract leaf pieces made from a red and orange inked sheet and a pendant made from the same background with the translucent overlay. The leaf pieces from the decorated clay sheet show the design and color variations that can be present with this technique. The long piece shows how the background and the translucent canes can compliment each other.


 As you may have noticed on my workshop page, and in some of the earlier postings, I started my childhood creative explorations in the world of bead-weaving. I love the look and feel of those tiny seed beads, and the magical way a piece literally grows in my hands. It's a very different process from working with polymer, and I really enjoy doing both. As I was making up some pendants from the translucent chrissy canes I'd made, I started thinking about what I would use for chains...I was struck with the idea of staying away from metals, and making the chains for the pendants out of seed beads. Why not?
 One of the things that's wonderful about both polymer and beads is color. Color just sings to me, and is one of the main reasons I migrated a bit from PMC (precious metal clay silver) to polymer. The translucent clay I've been working with has a muted, luminescent quality which is lovely and soft. I wondered what the addition of seed beads would do.
 The photos in this post show the results. I'm quite pleased with the way these necklaces turned out. I decided to use the triangular "zig-zag" stitch for the chain for a few reasons. I like the look, it's a fairly strong stitch since you go back through most of the beads, and it works up relatively quickly. I think the beads help bring out the colors in the translucent pendants, and add a bit of sparkle and contrast. I may have to try some richer fall colors and see what happens......

 The earrings on the left were made with another color combination.


